
Want to show support?
If you find the information in this page useful and want to show your support, you can make a donation
Use PayPal
This will help me create more stuff and fix the existent content...
If you find the information in this page useful and want to show your support, you can make a donation
Use PayPal
This will help me create more stuff and fix the existent content...
https://console.firebase.google.com/project/pepedocs-ecf95/storage/pepedocs-ecf95.appspot.com/files?hl=es-419
| Shortcut | Meaning |
|---|---|
Ctrl + Shift + P |
Open Command Palette |
Ctrl + Shift + D |
Open Debugger tab |
Ctrl + N |
Create new generic file |
Ctrl + Alt + Win + N |
Create new file with commander |
Ctrl + S |
Save |
Ctrl + Shift + S |
Save As... |
Ctrl + F4 |
Close current file |
Ctrl + o |
Open file... |
Ctrl + k ; Ctrl+ o |
Open folder... |
Ctrl + b |
Toggle Open/Close File Explorer |
F2 |
Rename file/folder |
Ctrl + F2 |
Refactor/Change ocurrences in code (cursor) |
Ctrl + Shift + L |
Refactor/Change ocurrences in code (cursor) |
Ctrl + ` |
Open terminal |
Shift + Alt + F |
Try to fix/format Indentation |
Ctrl + k ; Ctrl + F |
Try to fix/format Indentation only on selected code |
Ctrl + , |
Open Settings |
Alt + Z |
Toggle Wrap Lines |
Ctrl + / |
Toggle comment |
Ctrl + Shift + V |
Open Preview of file (i.e. Markdown) |
Ctrl + P |
Open file palette (change file withno mouse) |
Shift + Alt + Select Click |
Allows to select multiple lines (box select) |
Shift+ Alt+ → |
Select level of code (→ again to expand selection) |
Shift+ Alt+ ← |
Shrink selected level of code (← again to shrink) |
Ctrl + K ; Shift + Enter |
Pin Current File Tab |
| Shortcut | Meaning |
|---|---|
Alt+ ↕ |
Move line up/down |
Shift+ Alt+ ↕ |
Duplicate line up/down |
Ctrl+ L |
Select line |
Ctrl+ D |
Select next occurrence of current selction |
Ctrl+ G |
Go to line |
Ctrl+ K ; W |
Close all tabs |
Ctrl+ Number |
Switch focus on Editor Group |
F11 |
Toggle Full Screen mode |
Alt + Wheel ↕ |
Fast Scrolling |
Ctrl+ Alt + ↓ |
Insert Cursor Below |
Ctrl+ Alt + ↑ |
Insert Cursor Above |
Ctrl + k ; Ctrl+ x |
Remove Trailing Spaces |
Ctrl + End |
Go to end of file |
Ctrl + Home |
Go to beginning of file |
Ctrl + K ; Shift + Enter)#region <Optional Name for region> #endregionWh(e|i|o) : OR lettersg(oog)+le : one or more pattern of words^code begin with certain word code$ end with certain wordcode .: Use it on the folder to open it on VScode --version: use it to check VS code full version infocode <file_paths>: use it open one or more files in VS code +▼ button to select which terminal or to open multiple terminals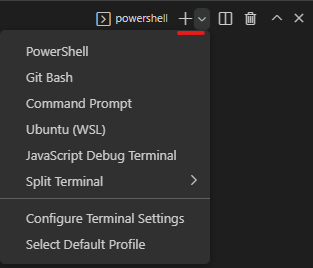
code --help for common help of code commandTo open settings go to File -> Preferences -> Setting or Ctrl + ,
Click on gear icon to reset setting to default
Common Settings : Font size: 16, Tab size, Auto save, Render Whitespace: trailing, Insert spaces
Switch between tabs and spaces: Ctrl + Shift + P or on the bottom Blue bar click on the Spaces: N label then select the Convert Indentation to Tabs or Convert Indentation to Spaces
Change number of spaces: Open command palette (Ctrl + Shift + P) or on the bottom Blue bar click on the Spaces: N label then select the Indent Using Spaces
Change theme go to File -> Preferences -> Color Theme (Ctrl + K ; Ctrl+ K) : Use Dark+
Open Settings and type Minimap for the checkbox to enable/disable
Change Language specific settings: Open command palette and select the Preferences: Configure Language Specific Settings... and select the language to modify Language
Check settings JSON file: Open command palette (Ctrl + Shift + P) and select Preferences: Open User Settings (JSON) or Preferences: Open Default Settings (JSON)
Consider enabling Bracket pair colorization
Sticky Scroll In settings search for Sticky Scroll, enable it and (optional) set nested scopes, recommended is 5
Customize the terminal
Ctrl + Shift + P + Preferences: Open User Settings (JSON))"workbench.colorCustomizations": {
"terminal.background": "#07053b",
"terminal.foreground": "#ffffff",
}
Set Custom Keyboard Shortcuts
Ctrl + K ; Ctrl + S)// Place your key bindings in this file to override the defaults
[
{"key": "Ctrl+U", "command": "workbench.action.files.openFile"}
]
"workbench.action.files.openFile" in this case and verify it is mapped to specified shortcut ("Ctrl+U" in this example).code-workspace file with a nameCtrl + K + F) and reopen it with File -> Open Workspace from File... and using the .code-workspace fileInstall/Uninstall an Extension
Ctrl+Shift+X)@like @category, @builtin, @sort:rating, etc. and combine them. Example: @category: "themes"You can use Gear icon on the Installed extension to Enable/Disable it if you don't want to use it at the moment for some reason, for example disable Python Extension to work on a Non-Python related project
Ctrl + Shift + P) and select Extensions: Disable All Installed ExtensionsYou can disable auto-update on extensions if you go to command palette (Ctrl + Shift + P) and select Extensions: Disable Auto Update for All Extensions
To enable a formatter/linter you need to:
To customize an extension settings go to Gear icon -> Extension Settings
Live Server extnesion to launch a dev server that reloads in real time, to avoid reloading the browser
A code snippet is like a template or re-usable code block that you can customize and use in your program, VS has 3 types of code snippets we can use: Built-in, Custom (defined by user), Downloaded (like extensions)
Built-in on command palette (Ctrl + Shift + P) select Insert Snippet or on the editor write the name of the snippet and on the suggestion click on the one with for the snippet
Downloaded you actually add an extension with snippets, to do this go to the extensions search bar write snippets find snippets for the language you want
Custom on command palette (Ctrl + Shift + P) select Configure User Snippets -> Select Language define snippet in the template using the specified syntax, to remove snippet just delete it from that same file
+ button on the source control panel (ctrl+shift+G) to stage changes and see a visual dif↶ to discard changes to filesCtrl + Shift + U) select Git on the Dropodown that is on the right upper corner
Ctrl + Shift + P) and select Python: Select LInter then select one of the options or Disable Linting (Check Linting messages on bottom left corner)python -m venv .venv (this will create a .venv folder).venv/Scripts/activate.bat or & c:/Users/jmsandov/repos/vs-sandbox/python_project/.venv/Scripts/Activate.ps1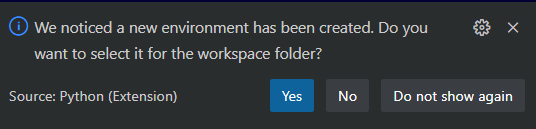
python -m pip install matplotlib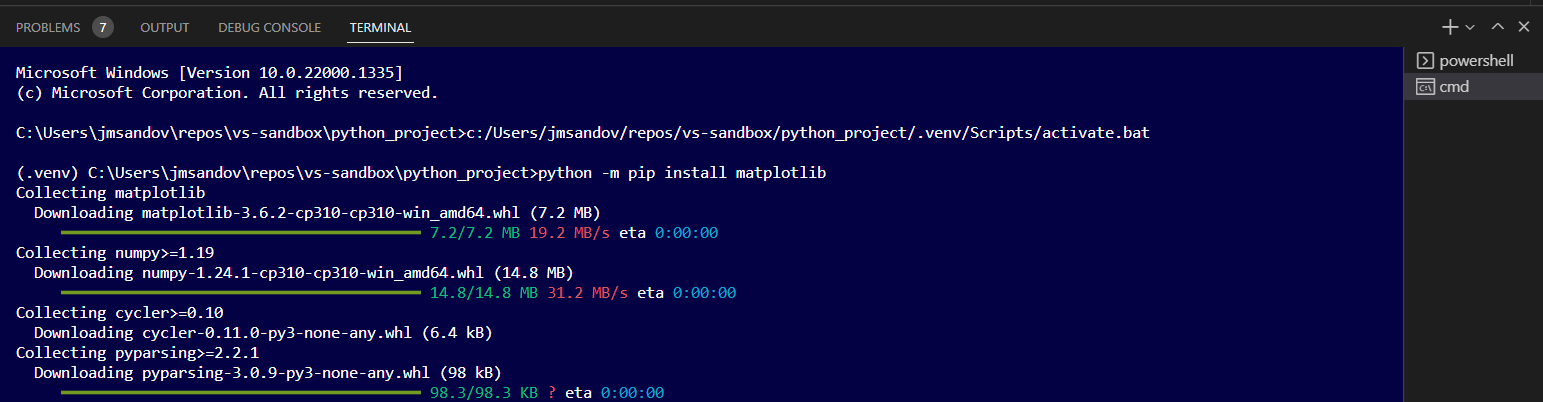
Ctrl + Shift + D) and click on Run and Debug or click Debug Python File on the top right corner + button or check the Local and Global variables
{} to add expressions i.e.: Value of n: {n})ipykernel with pip install ipykernel (if you don't do this VS code should prompt you to install it automatically)Ctrl + Shift + P) then select Create: New Jupyter Notebook untitled.ipynb file, save the file (Ctrl + S) and make sure to save it with .ipynb extension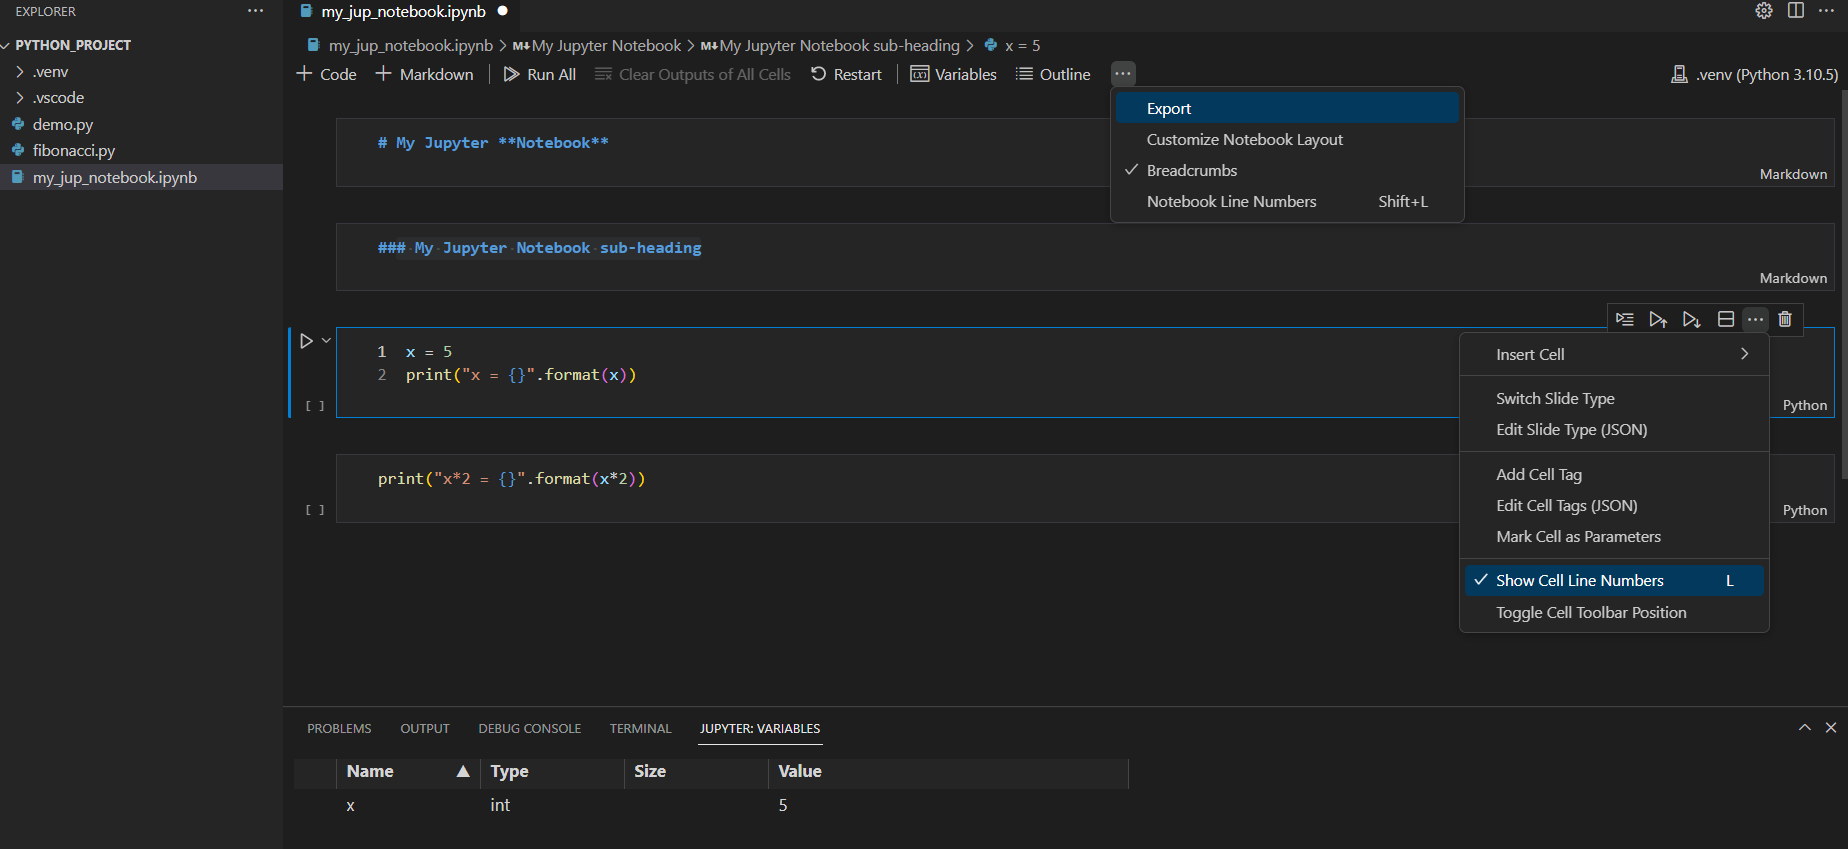
. to open a Github Codespace for your repository, which is basically a VS code online Editor> (nested), +(one after another), *(repeat), ( ) (group), {content} (add content), # (add id), . (add class) then click enter i.e.:div>u1>lidiv>u1>li*5div+div+p+img or (div*2)+p+imga{Link text here}div#id_name_here{this is a div}div.class_name_here{this is a div}>img+pftp-syncgit --version in a cmd promptftp-kr plugin in Visual Studio CodeF1 to open the commands input and enter ftp-kr: Init to open the ftp-kr.json config fileremotePath (Make sure a folder with the same name you put in here exists in the remote system), host, username, password,protocol and port. For example{
"host": "192.168.1.94",
"username": "myuserhere",
"password": "mypasswordhere",
"remotePath": "/home/jose/jms-box",
"protocol": "sftp",
"port": 22,
"fileNameEncoding": "utf8",
"autoUpload": true,
"autoDelete": true,
"autoDownload": false,
"ignore": [
".git",
"/.vscode"
]
}
F1 and enter ftp-kr: Upload All in the command input and you should see if uploads files in the Output, every time you save a file it should be uploaded automatically as wellbash as terminal on Visual Studio CodeInstall git for Windows
Opens User Settings file (File -> Preferences -> Settings) then click on the brackets icon ({}) to open in JSON
Ctrl+Shift+P or F1 to open the commands input and type Preferences: Open SettingsOn the user settings side (right-side) add to the JSON file: "terminal.integrated.shell.windows": "C:\\Program Files\\Git\\bin\\bash.exe". For example it may look like this:
{
    "editor.detectIndentation": false,
    "files.trimTrailingWhitespace": true,
    "diffEditor.renderSideBySide": true,
    "git.autofetch": true,
    "terminal.integrated.shell.windows": "C:\\Program Files\\Git\\bin\\bash.exe",
    "window.zoomLevel": 0
}
.bashrc in your home (~) for your aliases and stuff, execute: cd; echo alias ll=\'ls -alF\' >> .bashrcIf you find the information in this page useful and want to show your support, you can make a donation
Use PayPal
This will help me create more stuff and fix the existent content...