Firebase Course
- Firebase provides BaaS (Back-End as a Service), services:
- Cloud Firestore: Realtime database, NoSQL document database, easily configurable security rules
- Hosting: SSL automatically provisioned, deploy from CLI
- Storage: you can store any type of file (images, videos, text documents, etc), it can handle large file, easily configurable security rules to access files
- Auth: email/password auth, OAuth Authentication (using of existing platform like Google, Twitter, FaceBook, Github, etc),
Firebase Basic setup
Create a Firebase Project
- Go to Firebase console (The Firebase Console: refers to the web page GUI where you can setup a project in Firebase and configure it)
- Click on "Add Project" Button, give it a name and create your project (You can leave the defaults when prompt for other stuff)
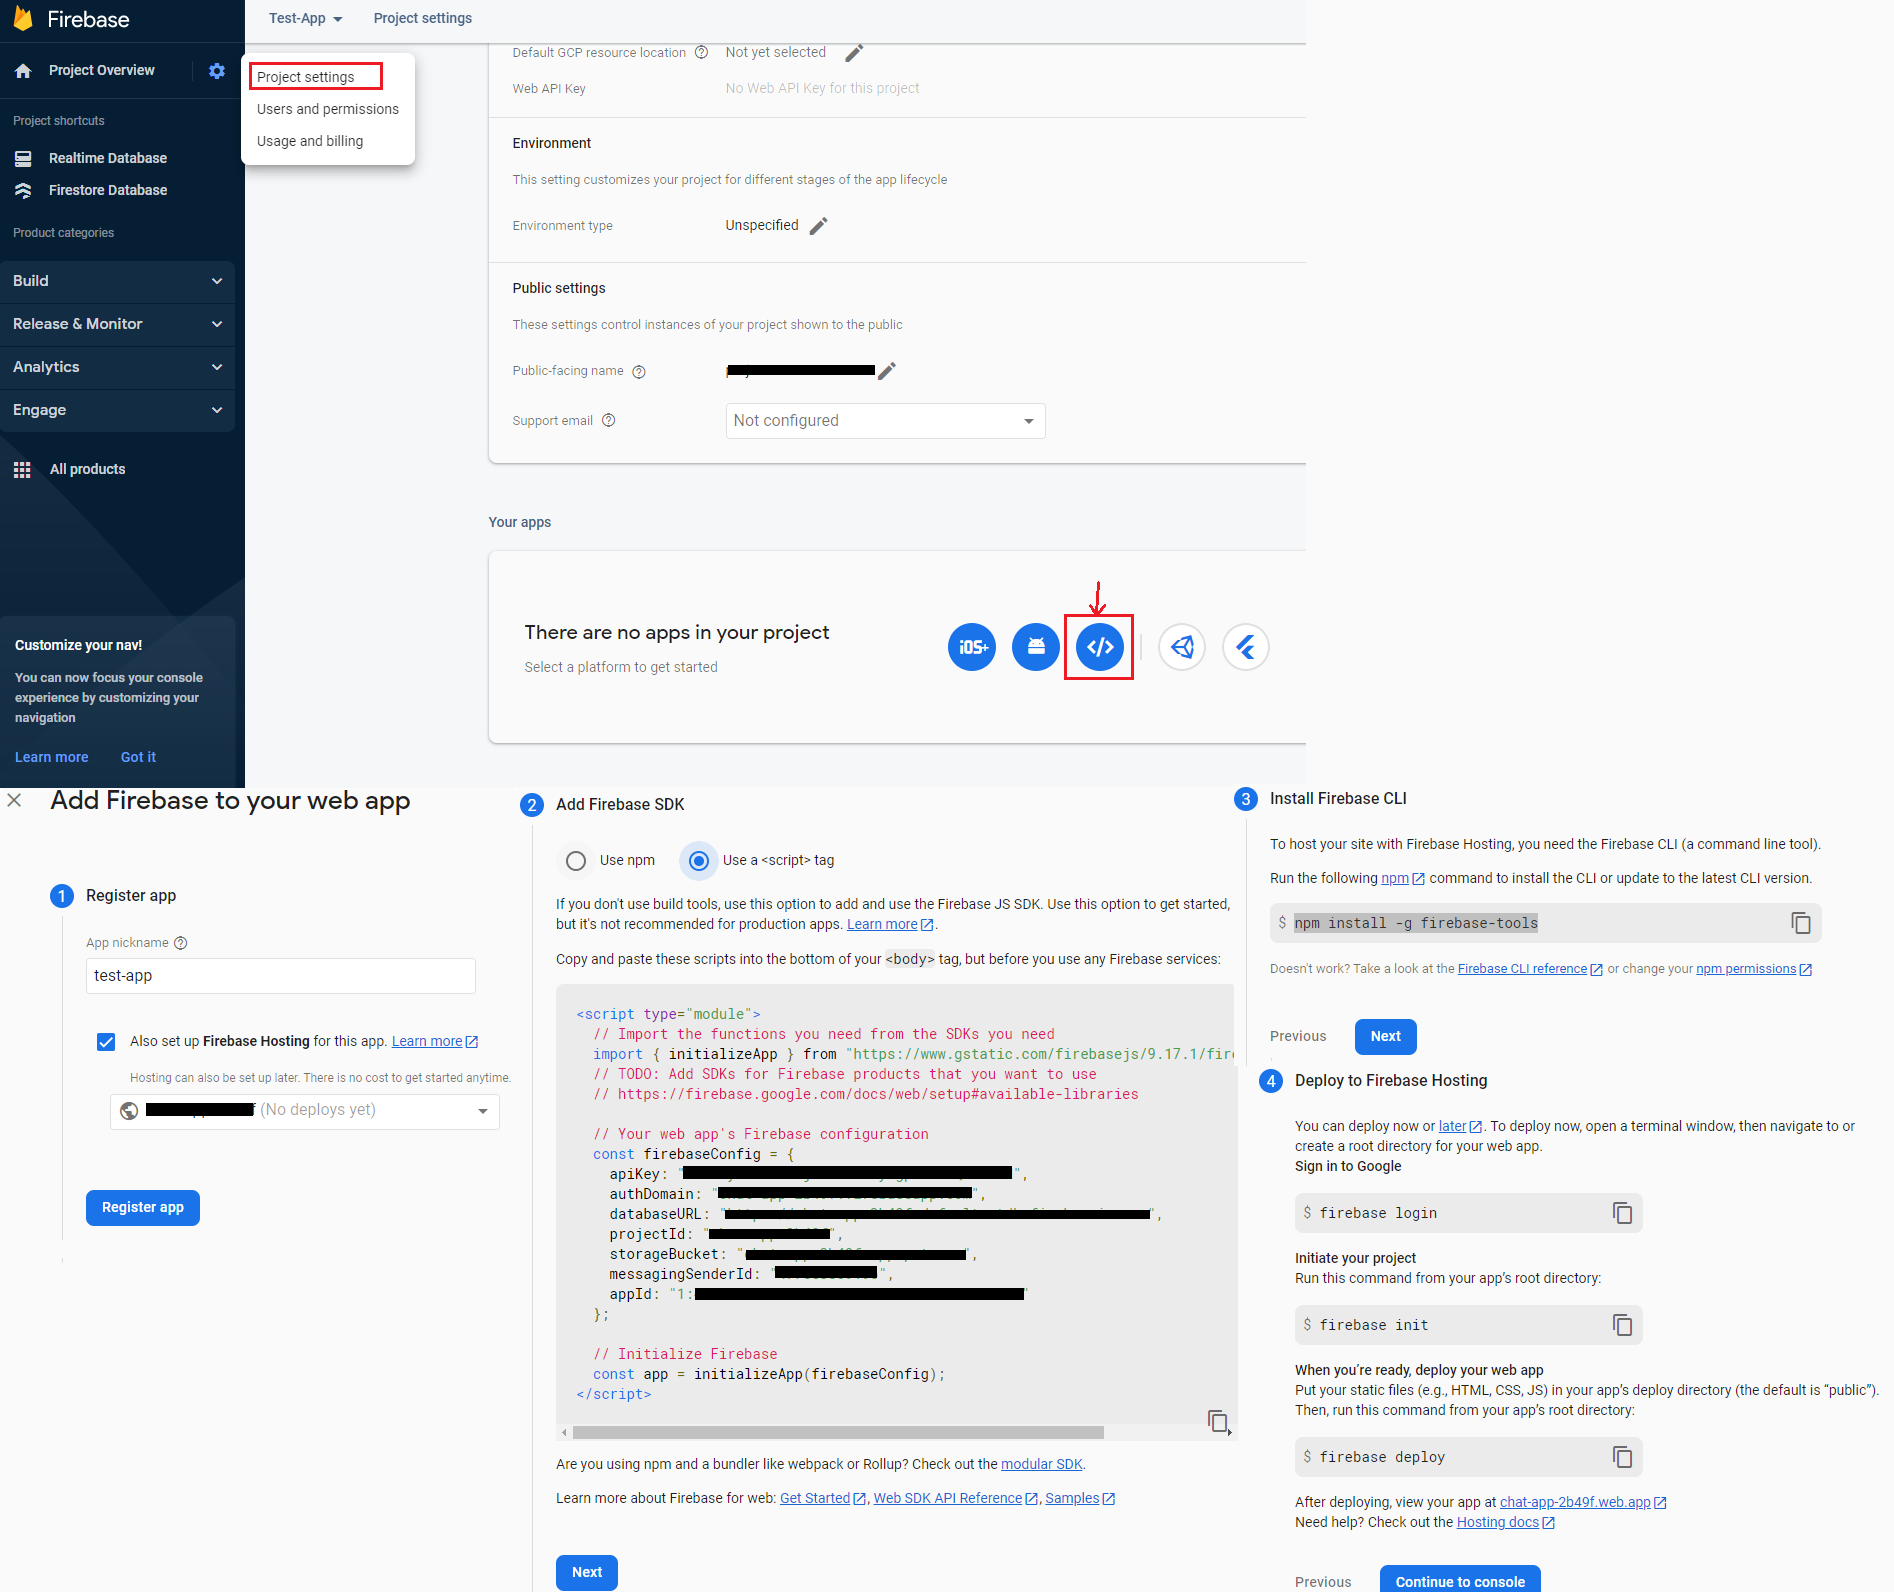
Add a web app to your project
- Go to project settings, scroll to the bottom and click on the web button, follow the prompts to generate the Firebase configuration
- (Optional) install Firebase CLI, this is recommended if you plan use Firebase as a hosting service and deploy your web app on Firebase
- First install nodejs and npm with
curl -fsSL https://deb.nodesource.com/setup_19.x | sudo -E bash - && sudo apt-get install -y nodejs (check NodeSource documentation for more info about installation)
- Check Node version
npm version && node -v
- Install Firebase
sudo npm install -g firebase-tools (This command takes a while be patient here)
- (Optional) To deploy:
- Run
firebase login and login with your Google credentials
- If prompted for data collection you can answer n
- Run
firebase init on the app's root directory
- When prompted for what Firbase CLI you wan to set up, select: Hosting: Configure and deploy Firebase Hosting sites
- When prompted to associate this project directory with a Firebase project, select: Use an existing project and select your firebase project
- When prompted for what to use as public directory, type: ./ (This tells firebase to look for index.html here)
- When prompted to configure a single-page app, select N and also select N when prompted to ovewrite index.html
- Put your static files (HTML, CSS, JS) in your app's deploy directory then on your app's root directory run
firebase deploy
To uninstall use sudo npm uninstall -g firebase-tools and remove sudo rm -rf /usr/lib/node_modules/firebase-tools /usr/local/bin/firebase
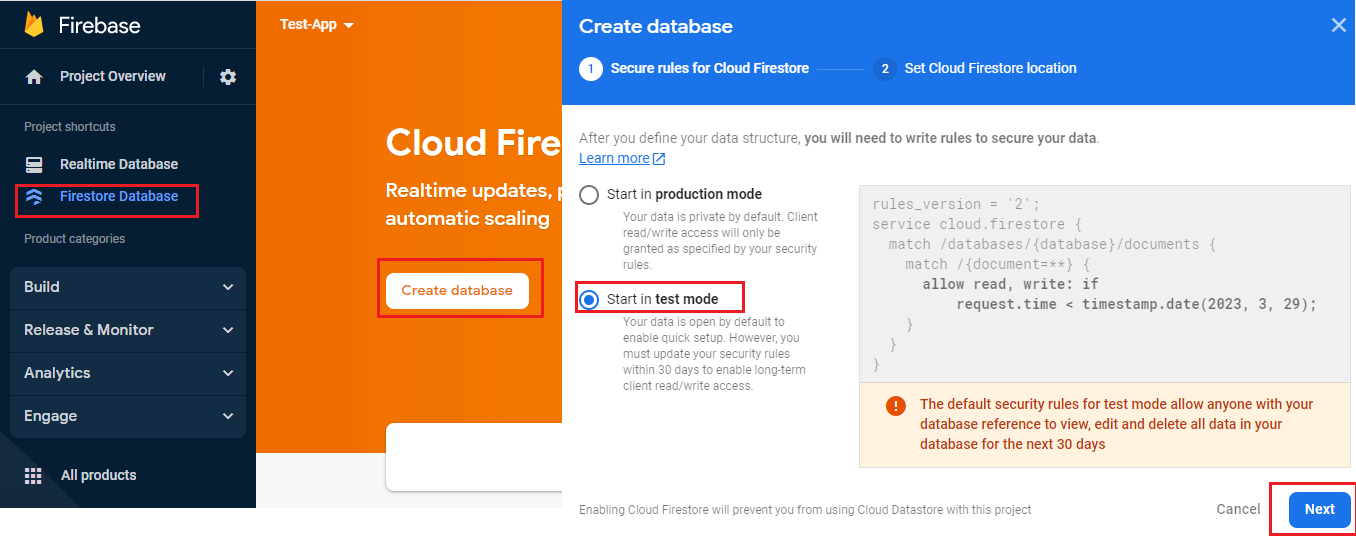
Create Cloud Firestore Database
- On the Right side panel look for the option that mentions Cloud Firestore and click on it
- Click on Create database
- When asked for Security rules make sure to start in test mode (This mode allows anyone to read-write the DB and expires after 30 days)
- Leave the default location (if you have setup a previous service that requires location you cannot change this)
- (Optional) Modify rules, for example to allow ANYBODY to read-write the database
rules_version = '2';
service cloud.firestore {
  match /databases/{database}/documents {
    match /{document=**} {
      allow read, write: if true;
    }
  }
}
Setup Firebase storage
- On the Right side panel look for the option that mentions Storage and click on it
- Click on Get Started
- When asked for Security rules make sure to start in test mode (This mode allows anyone to read-write the storage and expires after 30 days)
- Leave the default location (if you have setup a previous service that requires location you cannot change this)
- (Optional) Modify rules, for example to allow ANYBODY to read-write the storage
rules_version = '2';
service firebase.storage {
  match /b/{bucket}/o {
    match /{allPaths=**} {
      allow read, write: if true
    }
  }
}
Firebase Admin SDK
- Firebase Admin SDK is the official library developed by Google that allow users to integrate Firebase with different
programming languages (Java, C#, Python, etc.) this means it allows you do all the things you do on the web console programmatically
like operations on the firbase storage and databases
Python Firebase Admin SDK Installation
- (Optional/Recommended) create a
venv because firebase-admin has many Google dependencies
- Install (Go to Add the SDK for more install info)
sudo python -m pip install firebase-admin
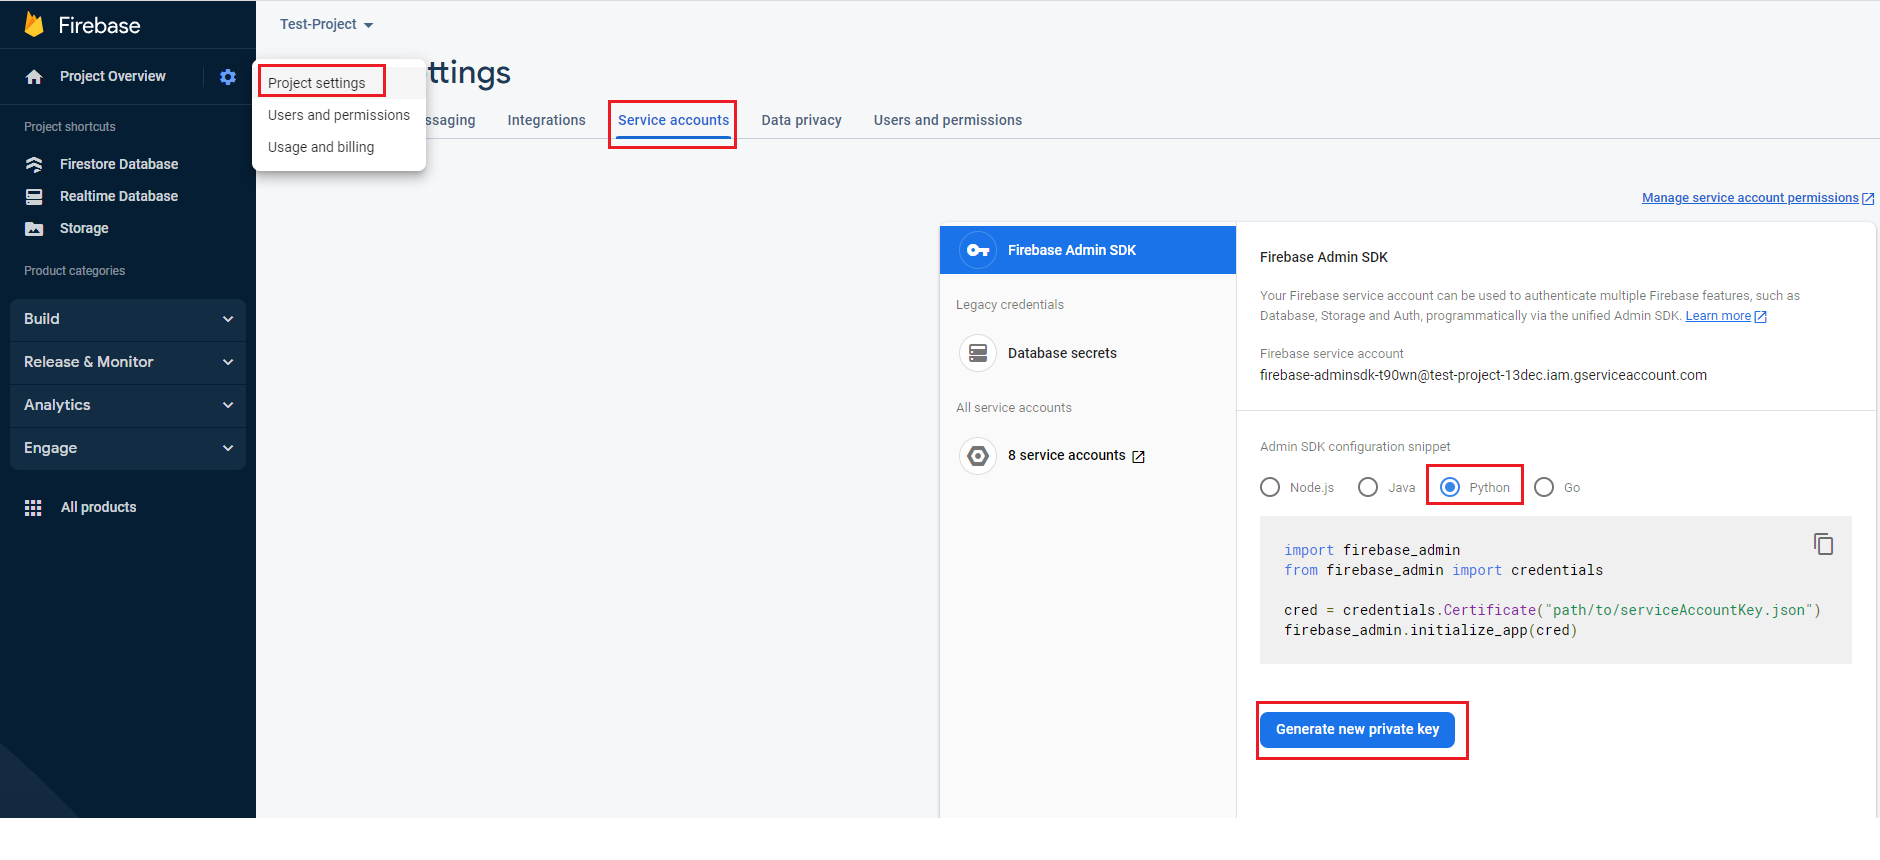
- Create a private key JSON
- Go to Project Settings and then to Service Accounts
- On the Firebase Admin SDK select Python and click on Generate new private key
- Save the generate .JSON file (you can change the name to just key.json)
- On your Python project create an app object using the JSON file key
import firebase_admin
from firebase_admin import credentials

key_path = "PATH_TO_JSON_FILE_HERE/key.json"
cred = credentials.Certificate(key_path)
app = firebase_admin.initialize_app(cred)
print(app)
Pyrebase4 is an alternative library to interface with Firebase but this is not built by Google
Firebase Authentication
- Authentication in Fireabase allows you to manage users for login and sign up purposes
Setup Firebase Authentication
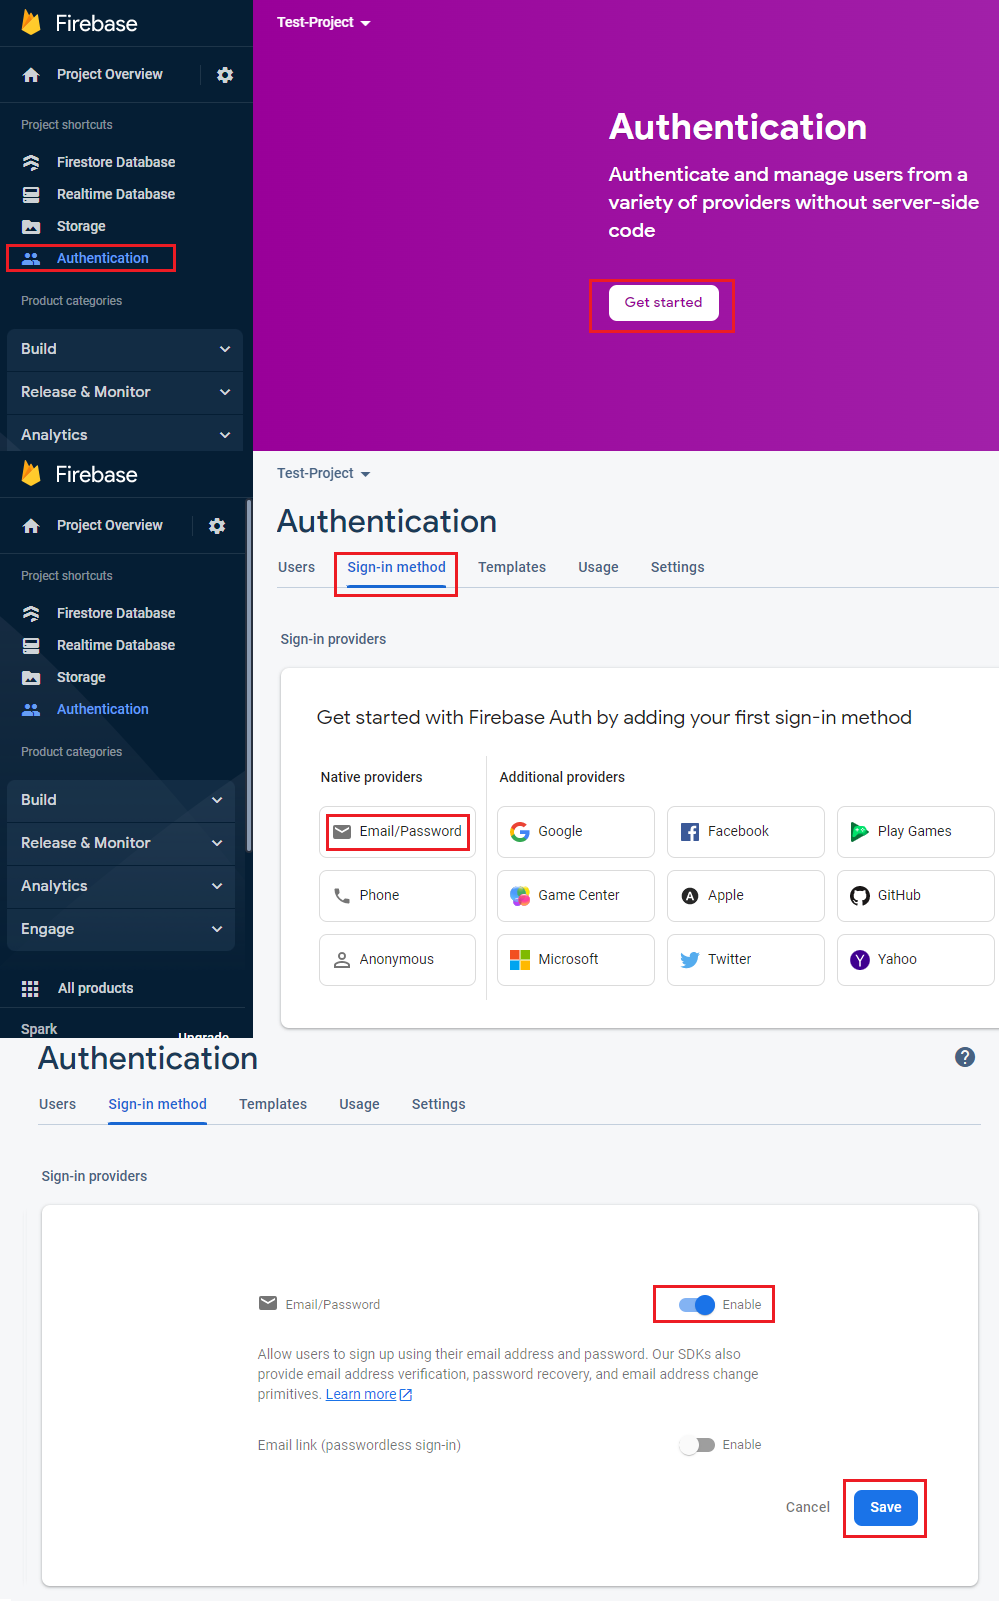
- On the Right side panel look for the option that mentions Authentication and click on it
- Click on Get Started
- On the Sign-in method tab select Email/Password to Enable it and click the Save button