Writing automated tests
Before we start writing any test the first thing is does the thing we want to test depends only on itself or does it have any external dependencies.
For any methods or functions or classes you want to test that don't depend on anything else you're going to put them in the unit tests.
Each test suite is a class and inherits from TestCase
Unit Test test a single part of a thing, it tests a single unit that doesn't depend on any other parts of our system. If we want to know whether 2 or more things work together that is no longer unit testing
if we want to test whether two or more parts of our app work we need to have Integration Tests which test the link between two different parts.
If we want to test whether our application, which can be using multiple parts or building blocks, work then we need System test, this will test the entire system from top to bottom as if it were a client/user of the system
patching allows us to override methods used by your code. For example you could patch the print function to change it's behavior you it will be easier to test a function that prints to screen instead of finding a mechanism that reads what was printed to stdout
- Patching relies on a context manager in python to do this we use the
with-as construct (with function as context_alias)
- Patching replaces a function with a patched version of the function (a mock) that has helpers which we can use for testing purposes. e.x. we can check if
print was called with a certain value
When doing any level of testing it is common that will need to decide if you want to test the outcome of a certain flow of operation(s) and you can either check certain functions were called or you can check whether some data has some expected values
A setup in testing is usually a function or process that runs before each test.
- For example when using
unittest in Python a setUp method is implemented which runs before every test method
- The
setUpClass method is also as setup with the difference it runs once for each TestCase, in other words once for each test class
TDD (Test Driven Development) is a dev paradigm that means think how your are going to use/test your modules/functions/code before implement it, first write all the tests of they will be used then the code that make those test pass
Running Unit tests
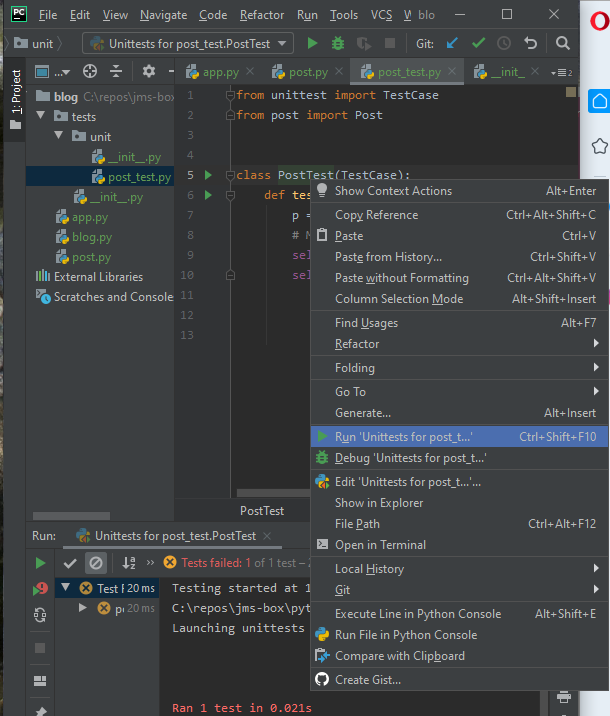
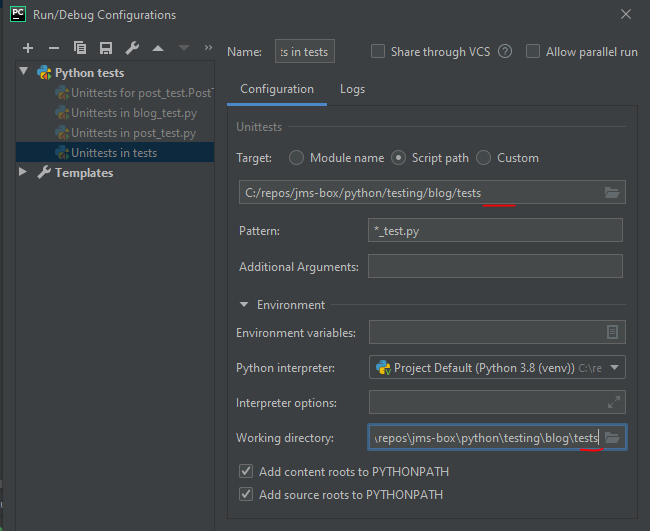
- The default pattern used by PyCharm is
test_*.py so if you name your files in the unit_test folder like that you should be able to run them all, you can also change the default pattern
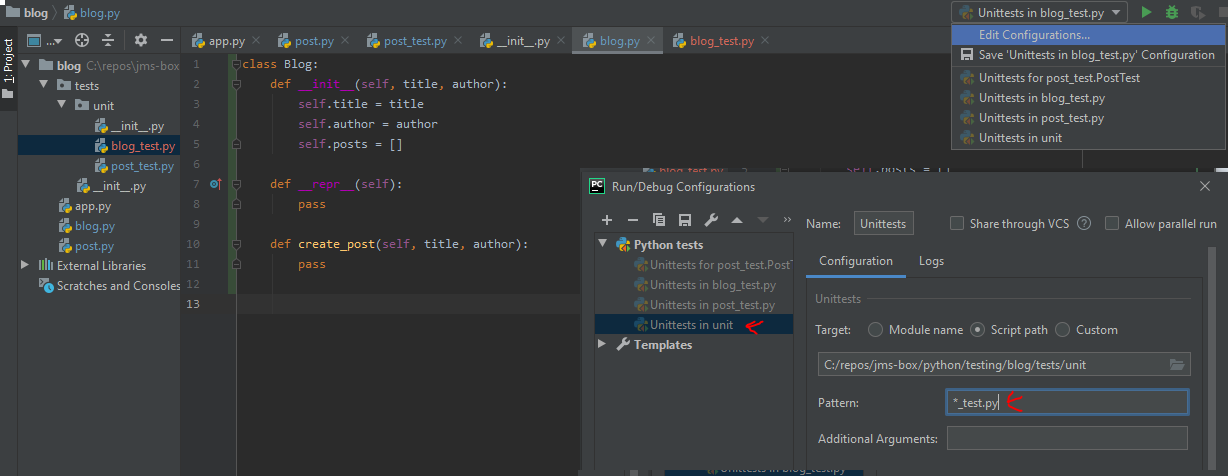
- If you have more types of tests like integration you can remove the unit from the target path and working directory
Testing a Flask app and REST APIs
- Flask provides a test client that allows us to make requests to a Flask app but doesn't run everything in the background.
from unittest import TestCase
from app import app

class TestHome(TestCase):
    def test_home(self):
        with app.test_client() as c:
            resp = c.get("/")
It is common to define a base_test class that has all the common functionality your test will share but contains NO actual tests
A rest API is a web service that clients can use to request a service or in other words interact with things
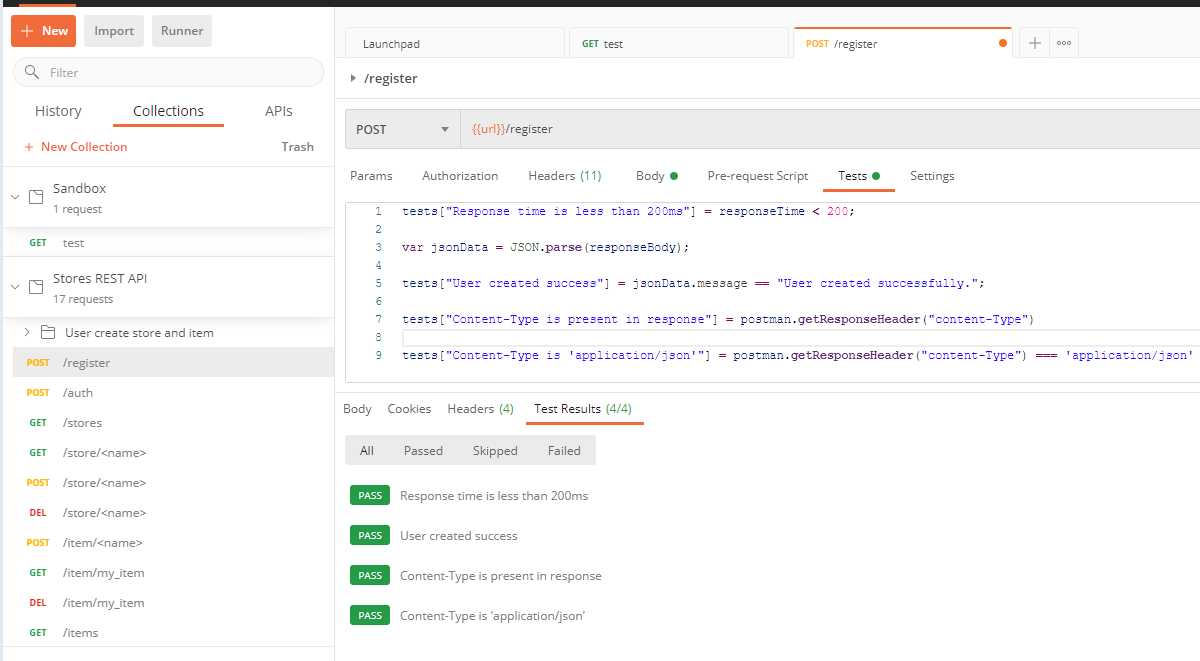
Testing a REST API with Postman
Postman is an API testing tools that can make request to a web server or web API
Allows to simulate high-level system tests
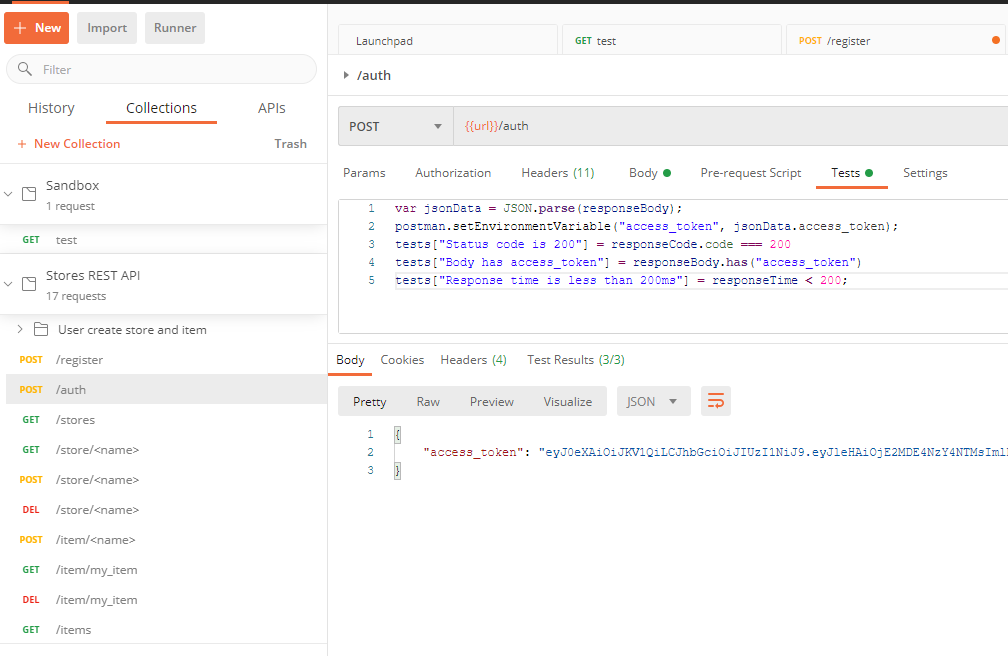
pre-request (runs before request is sent) and test (runs after response is received) sections can be used to write scripts in JavaScript syntax
postman makes variables available to you which can use to automate tests
postman.clearEnvironmentVariable("access_token");
tests["Response time is less than 200ms"] = responseTime < 200;

var jsonData = JSON.parse(responseBody);

tests["User created success"] = jsonData.message == "User created successfully.";

tests["Content-Type is present in response"] = postman.getResponseHeader("content-Type")

tests["Content-Type is 'application/json'"] = postman.getResponseHeader("content-Type") === 'application/json'
var jsonData = JSON.parse(responseBody);
postman.setEnvironmentVariable("access_token", jsonData.access_token);
tests["Status code is 200"] = responseCode.code === 200
tests["Body has access_token"] = responseBody.has("access_token")
tests["Response time is less than 200ms"] = responseTime < 200;
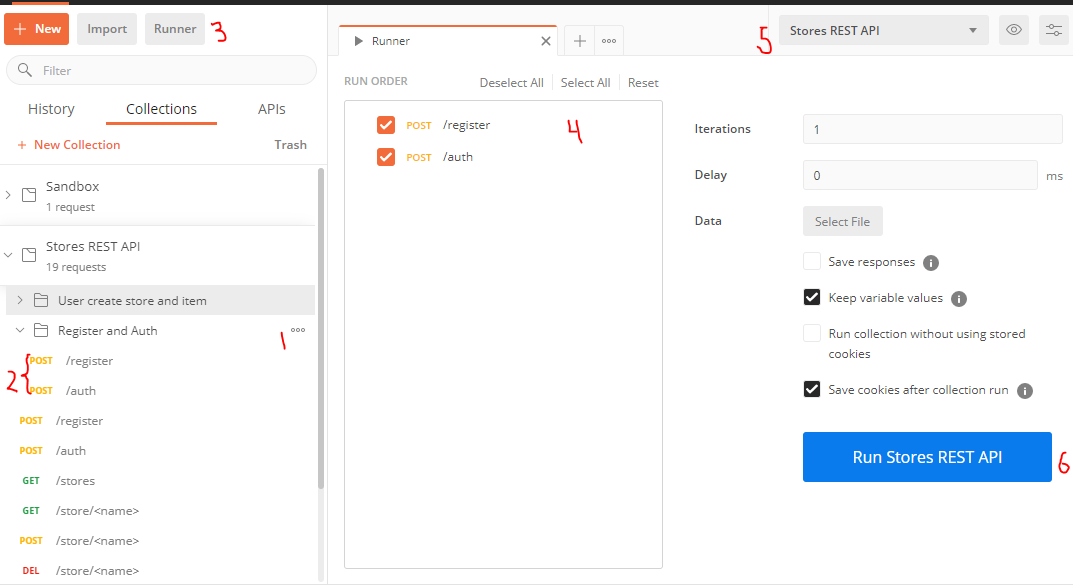
- To run a suite of tests in postman 1) create a folder, 2) add test to folder, 3) go to Runner 4) drag folder to RUN ORDER section 5) set environment 6) Hit the Run ... button
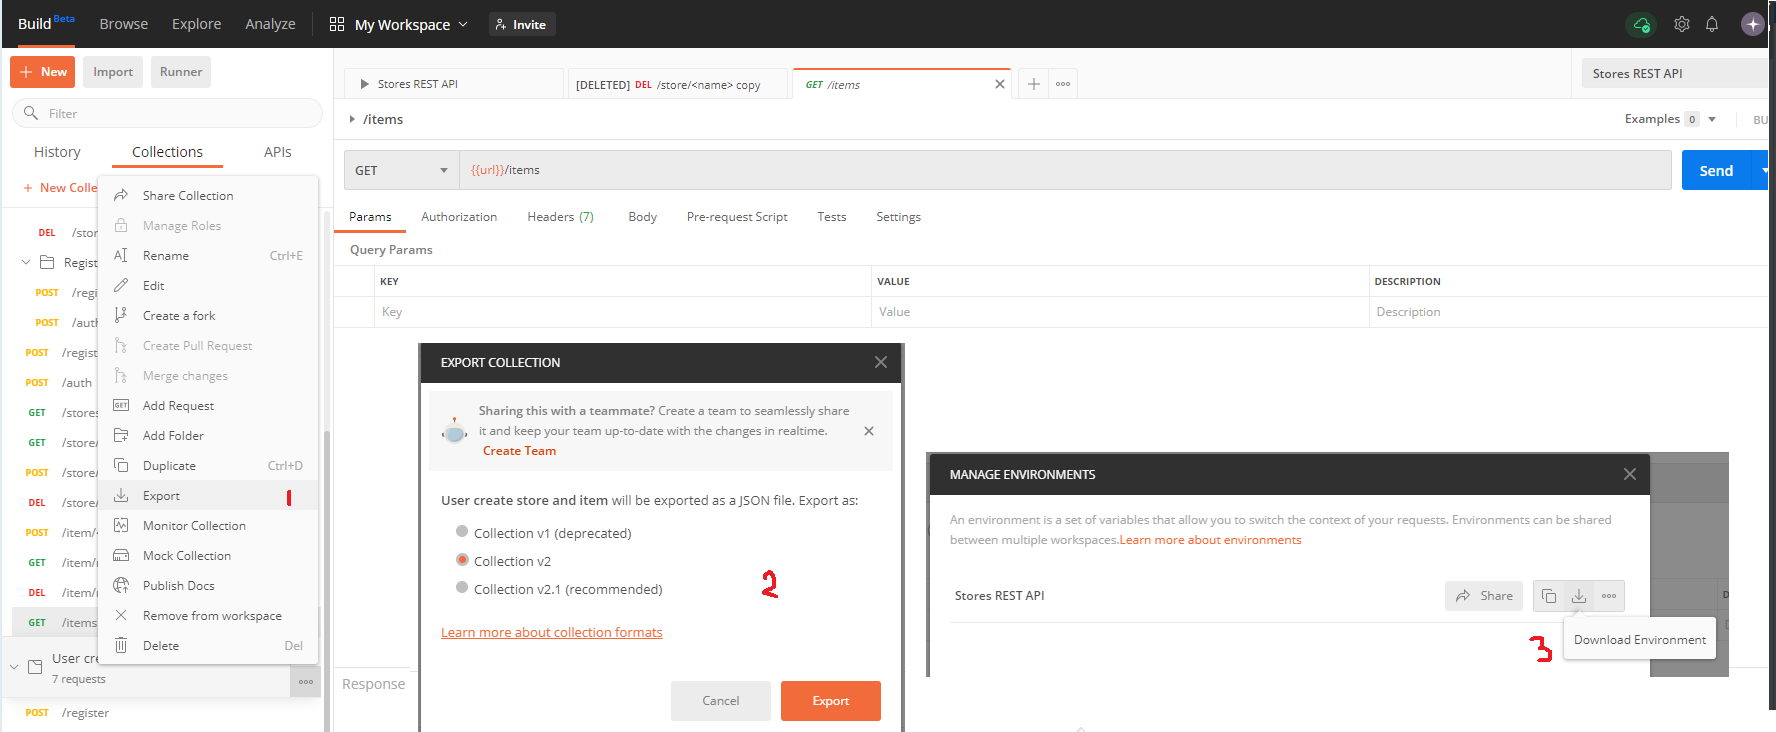
- You can export collections from Postman so other can use them, to do this just 1) export collection 2) select the correct version you want for export 3) Export the environment (Make sure to save both files without spaces)
Acceptance Testing
Acceptance testing is a layer that sits on top of system testing, it intention is the same, to test the system as if we were a user or in other, but the key difference is that acceptance testing tests should be writable by users/customers
And acceptance test is a very high level test of the entire system.
BDD (Behavior Driven Development) is a way of expressing tests very akin to what a customer would do.
Usually users/customers give requirements they give them in the form: "When something happens I want something else to happen" this can be translated to a requirement (Scenario) which must have clear assumptions, an event or action and a result(s) caused by that event or action (Steps)
Users/Customers can also give us a broader requirement that involves multiple Scenarios, a group of scenarios are referred as Features in BBD
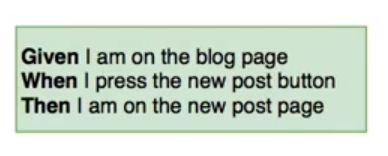
In BDD we can express a requirement in the form of Given-When-Then
- Given - States the assumptions or initial state
- When - States the actions or events
- Then - States the results, outcomes or what must me true (assertions) after the actions/events
- And - (Optional) Can be inserted after any steps to repeat the previous word, so for example after a
Given means the same as another Given
BDD has the goal of making the tests readable, easy to follow and reusable
BDD can be expressed in Gherkin which is a language that uses .feature files to document a feature we want to test which can have one or more scenarios
- reserved word:
Given, When, Then, And,...
- We usually specify elements we want as parameters in quotes
"" so we can use regex (re) to extract those from the test steps in out python step implementation
- We need to implement the steps we describe in each of the sections of a scenario using python
Feature: Name of the feature here
  Longer description can be added here

  Scenario: Name of scenario here
    Given assumptions here
    When actions or events here
    Then results
To pass data between each steps of a scenario we normally use a context variable
Make sure to have tests for specific features and full user scenarios don't feel the need to overly generalize everything and because that's not really necessary at the acceptance test level.
Locators & Page Models
Locators and page models are just a way of structuring your acceptance tests.
This model is used to avoid repeating code for example if you do the same action in different step functions
Locators are going to describe how to find an element in a page, this will allows us to easily search for an element.
- They are usually implemented using a class for each page that has attributes that identify elements of a page
Models will describe or represent a page itself
- They are usually implemented with a class hierarchy where we have a
BasePage that has things shared between all our pages and then specific classes for each page which have extra particular stuff
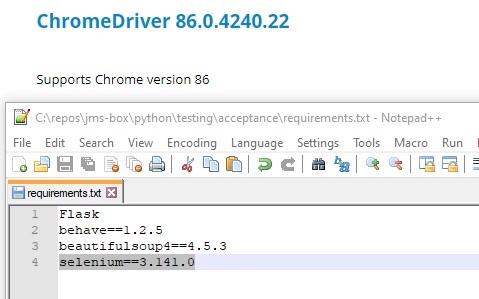
Install ChromeDriver
- Go to ChromeDriver - WebDriver for Chrome page and download right ChromeDriver for your Chrome version, after extraction you should get an executable
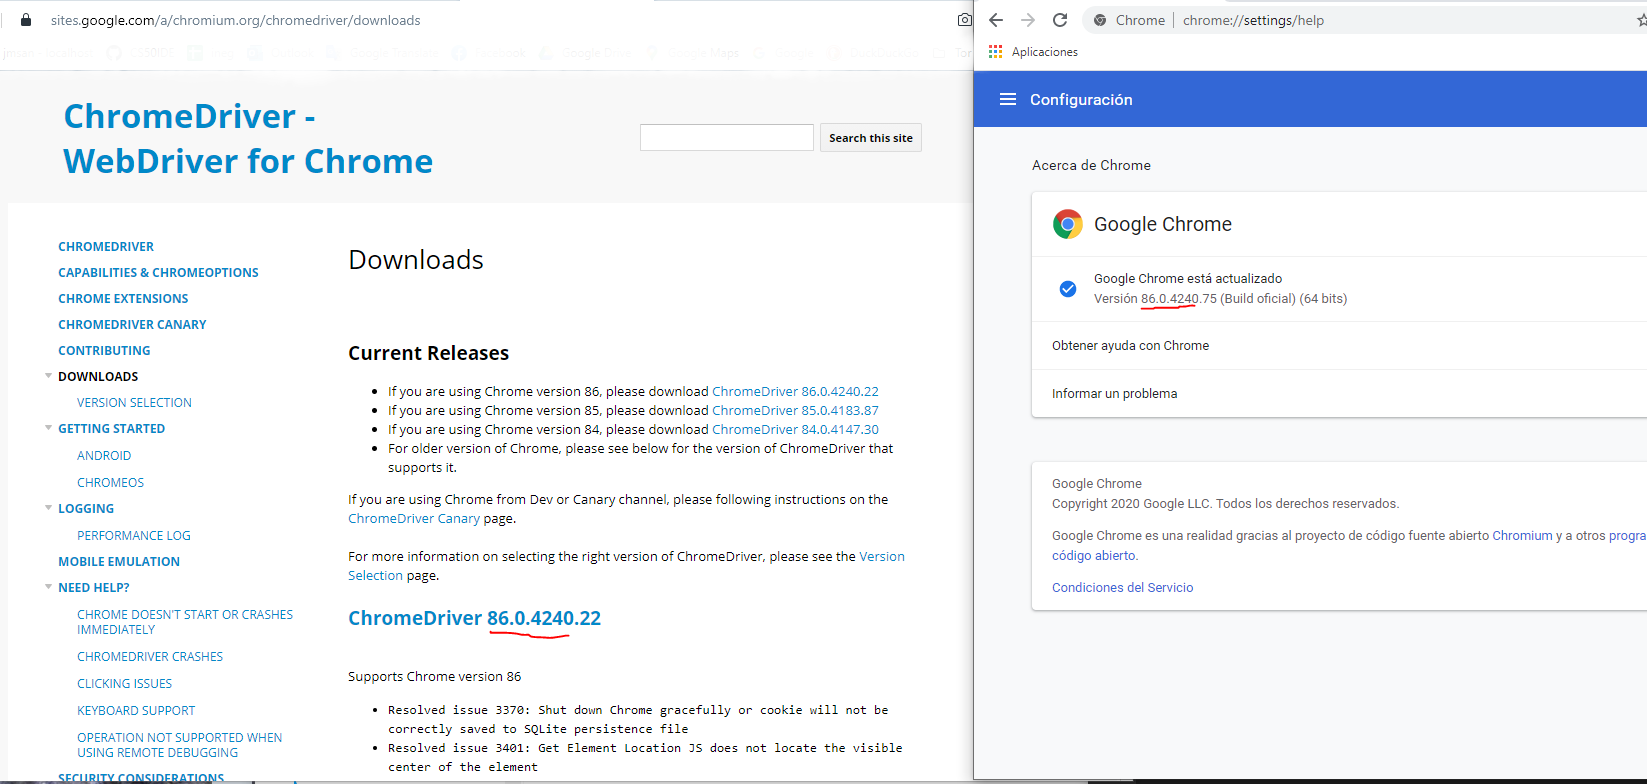
Specify location of the ChromeDriver executable
- Option 1: Add the ChromeDriver executable to the
PATH env variable
- Option 2: Use the absolute path to the ChromeDriver executable in your code
 CHROMEDRIVER_PATH = r"C:/repos/chromedriver/v86.0.4240.22/chromedriver.exe"
 mybrowser = webdriver.Chrome(executable_path=CHROMEDRIVER_PATH)
The downloaded ChromeDriver is an executable and when we do webdriver.Chrome() we are just basically executing this executable so our code needs to be able to find this executable file, this is why we need to specify its location
Running Selenium and ChromeDriver common errors
- If you are getting
selenium.common.exceptions.WebDriverException: Message: invalid argument: unrecognized capability: chromeOptions Error make sure to check compatibility of ChromeDriver and Selenium versions.
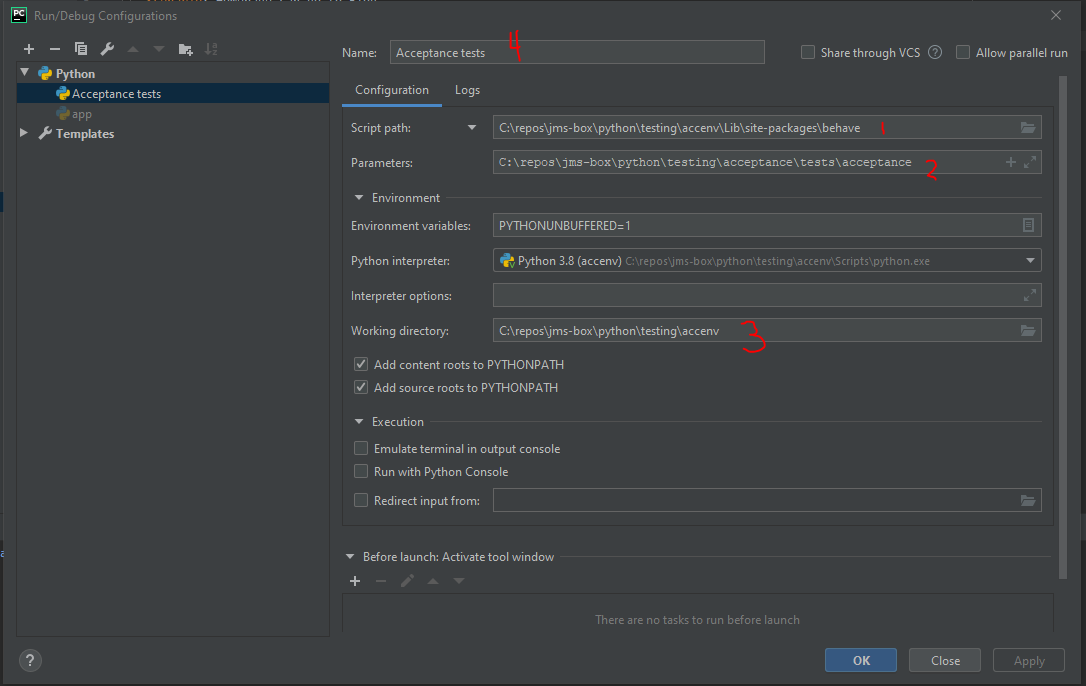
Running a .feature file in Pycharm
- Create a new configuration by 1) Going to Edit Configurations... 2) Hit the
+ and Select python
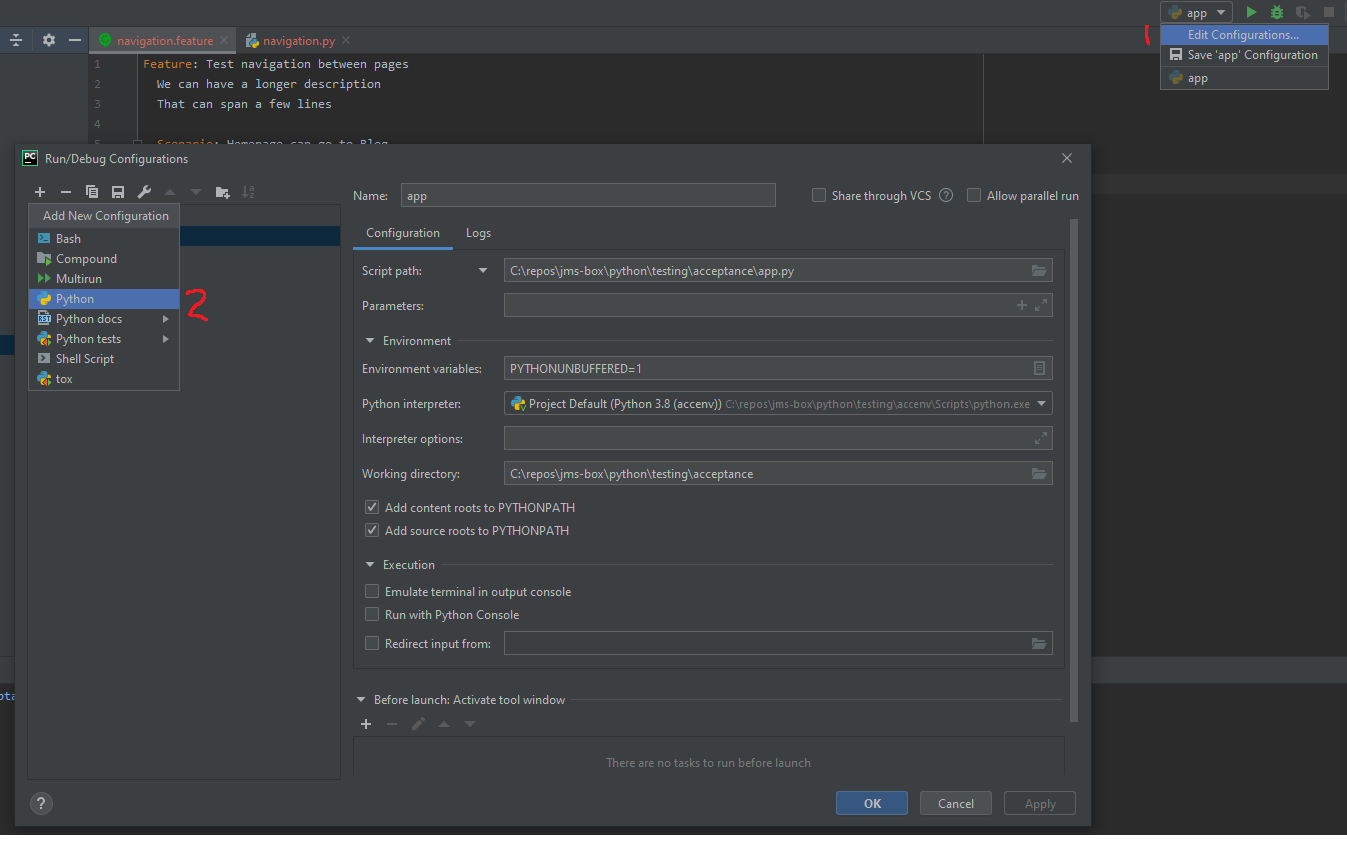
- Write the
behave (this is the reason of the import behave) script that will parse the .feature file and call the appropriate steps
- Script Path: is the path to
behave python package (if you are using a venv must be inside there)
- Script Parameters: is the path where test live
- Working directory: is the path python or your venv lives
- (Optional) Give it a name
MultiRun to run App + Testing
- Make sure to run you APp to a run config is created then just go to Edit configurations and 1) Create Multirun config 2) Give it a name 3) Add the other configs and 4) Add a delay between them

Waits on Selenium
from selenium.webdriver.support.ui import WebDriverWait
from selenium.webdriver.support import expected_conditions
try:
    WebDriverWait(driver=context.driver, timeout=5).until(expected_conditions.visibility_of_element_located((By.ID, "posts")))
except:
    # log something
    raise Exception()
References